
Wire on Fabric with Solder: Swatch 01
Attachment to fabric:
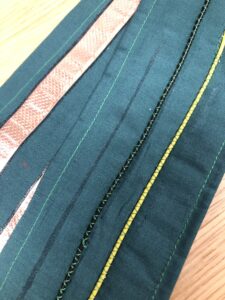
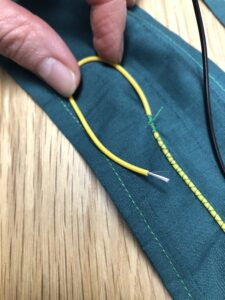
In this test, the wire is attached to the fabric with a zigzag stitch, completed on a sewing machine. To do this, you should sew on either side of the wire (not through the wire). The zigzag stitch is holding the wire in place, by sewing around it.
Attachment between components:
In this test, the wire is soldered to the components, which are all standard electronic components and not specially made for e-textiles. The components are also sewn to the fabric. The vibration motor is kept in place by putting a piece of fabric over it, like a pocket, and sewing around the motor, so it can’t slip out.

Pros and Cons:
The pro of this method is it performs well. Wire is a reliable conductor, and so is solder. You can expect very little resistance in this circuit.
A con is that it is a little difficult to sew components that were not designed for this application. Solder is not flexible, and the joints are prone to breaking, so you want to make sure the soldered connections are in an area that won’t be under strain (flexing or twisting). Reinforcing connections with flexible fabric glue can help make them more durable.
The couching stitch (zig zag) is labor intensive, and best done with a sewing machine. The battery connector pictured here, for a coin cell battery is low cost, but the tabs are prone to snapping.
2 thoughts on “Wire on Fabric with Solder: Swatch 01”