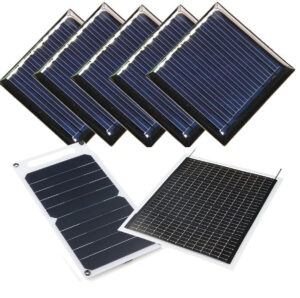
These PowerFilm flexible solar panels* are totally insulated in a thin plastic film for waterproofing purposes. In order to hook them up, it is necessary to puncture the plastic insulation to access the conductive pads and connect the solar panels to conductive material, such as wire or conductive ribbon. For wearables, we also have to consider how to attach the panels to fabric in a way that is both stable and flexible. Below are a few options.
*can also be purchased on Digikey or Amazon
Contents:
- Solder wire
- Solder copper tape
- Solder Snaps
2. Solder: Garment Installation
-
- Wire
- Copper tape + conductive ribbon
- Window method
- Mesh Panels
- Snaps
3. Ring Grommets (No Solder Required)
4. Medical Grade Conductive Snaps: Using a Press (No Solder Required)
- Socket side of snap, to be attached to Solar Panel
- Stud side of snap, to be attached to fabric
1. Solder: Hook-Up
The manufacturer recommends using a soldering iron to burn through the plastic coating on the panel and scrape it away. Then you can access the conductive pad to add solder and connect wire, copper tape, conductive snaps, or another solderable material of your choice.
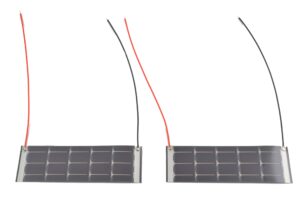
a. Hook-up Wire
Attaching standard hook-up wire is a great option for a reliable connection. If going this route, it may be a good idea to invest in a flat tip for your soldering iron similar to what they use in the demo video above. I found the process of melting the plastic a little difficult with a pointed tip, and used a combination of an soldering iron and an exacto-knife to scrape the plastic away before soldering.
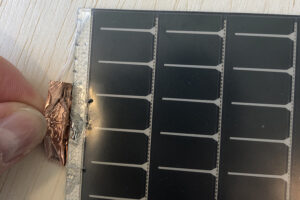
b. Copper Tape
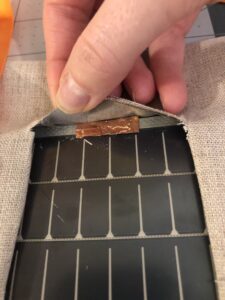
We also tried melting away the plastic, then attaching copper tape instead of wire because we wanted something totally flat. I found that adding some solder before adding the copper foil increased the reliability of this method. In some of the tests I also touched my soldering iron to the front of the copper tape, to bond it with the solder below it. This flat surface is useful for installing the panel into a garment, as you will see in section 2.

c. Solder Sewable Snaps
Another avenue is to solder on conductive snaps. I love how small these conductive snaps are from Sparkfun, and that they offer a reliable connection that is also removable. However, drawbacks are:
- The socket side is designed to be sewed by hand, which can be time consuming.
- If you add too much solder to the snap side, it can affect the ability of the snap to fit into the socket.
- The snaps are connected to the panel by the solder only. Through repeated connection with a female socket, they can pop off the panel. (Snaps attached through a grommet press don’t have this issue, shown in part 4 of this post).
2. Solder: Garment Installation
a. Hook-up Wire
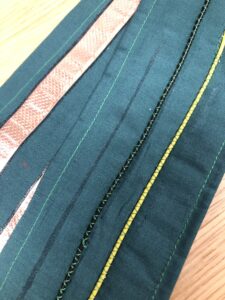
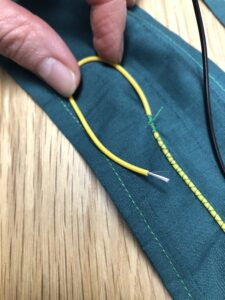
If you decide to solder wires onto your solar panels, you will have to consider how to run them through the garment. One method is to use a couching stitch, or zig-zag stitch to help keep the wire stable against the fabric, such as in this swatch. If you don’t stabilize your wire, they may pull and create stress on your solder joint. Before your start your project, make sure you measure how long you need your wires to be.
b. Copper Tape + Conductive Nylon Tape
These two materials pair well as an alternative to wire, because they are both completely flat. Conductive nylon tape is flexible, has low resistance, and is easy to sew, and in the examples below, it is being used in place of hook up wire, so that we have an entirely flat connection.
The challenge is in connecting the copper tape on the solar panel to the conductive nylon tape, because we cannot solder to conductive ribbon. The examples below focus on pressing the copper tape on the solar panel between the conductive ribbon and fabric. In this method there is no mechanical connection between the conductive ribbon and the solar panel, we are simply relying on sandwiching the materials to make contact.
i. Window Method
I tried this two ways, one in which I cut out windows in the top fabric piece and pressed the solar panels face down to make contact with the conductive ribbon traces:
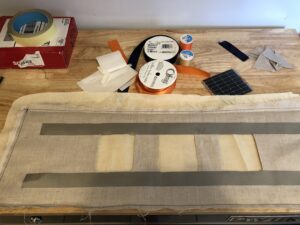
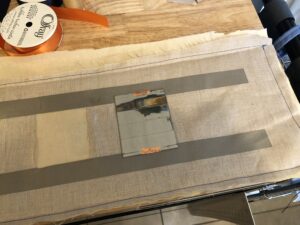
I added a second piece of fabric behind the solar panels, and sewed around the four sides of each panel to help keep them in place. *You can not sew through these panels* I am simply sewing around them to keep them pinned and stop them from moving away from the window. The window frame is what prevents them from falling out, it is covering a small part of the usable area of the panel, which is a drawback. I also ended up adding some satin ribbon as a trim to each window, because the fabric was fraying. If I were to do this again I would use a fabric that doesn’t fray, like felt or neoprene.
By pulling back the sides of the fabric window, it is possible to remove these solar panels, since there is no mechanical connection. That could be a pro for some applications. For example, you could remove the panels for washing.
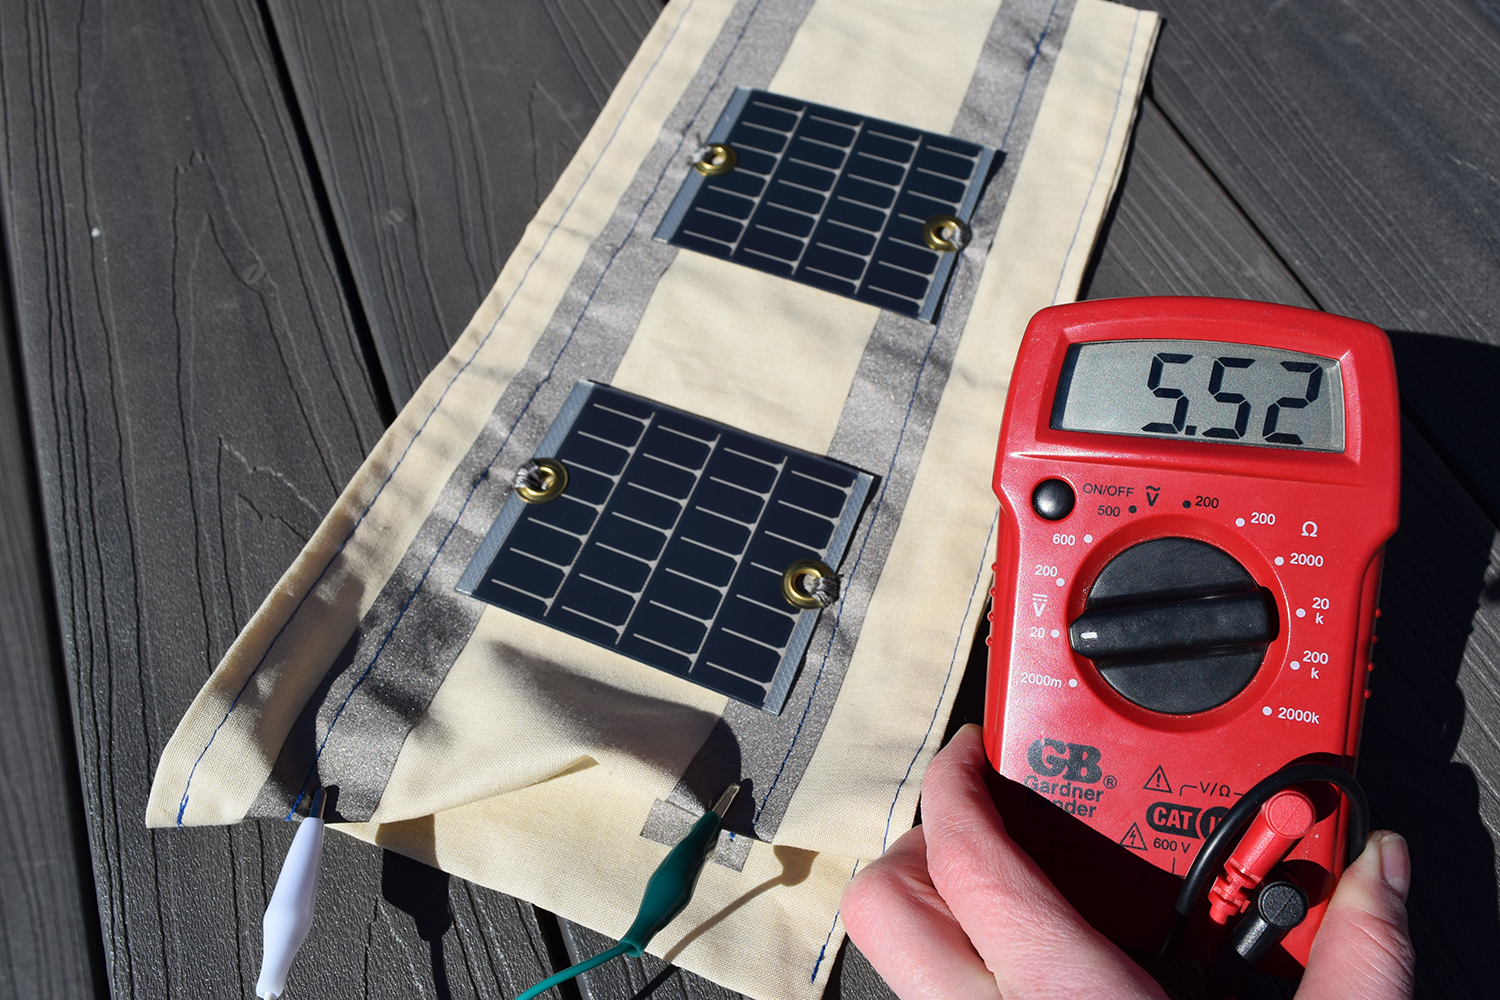
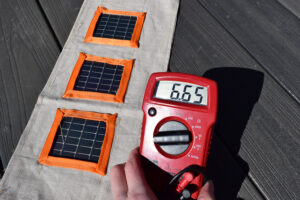
We were able to get a decent reading through the multimeter (higher than the expected output of these panels, which was 4.8V), which shows that this method, which again is only making contact by pressing the material together, could be viable. Again, a pro is that the panels are fully removable. A con is that they could move around and you may not always have a reliable connection. We did not extensively stress test this sample but if you are an IDM student you are welcome to borrow it and test it yourself!
ii. Folded Ribbon with Mesh
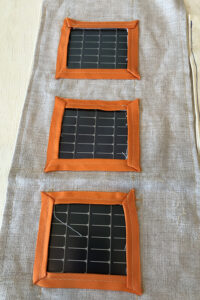
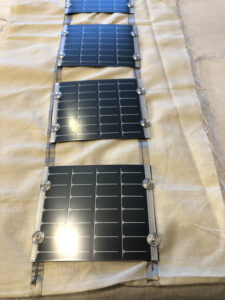
This method is similar to the window method, however instead of using a top fabric with windows, I used mesh as the top piece to keep the panels in place, and again, sewed around the panels (not through them).
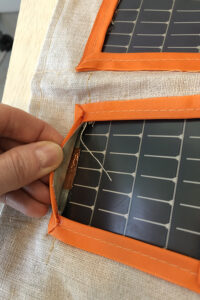
The conductive ribbon is attached to the bottom fabric in this application. But because I needed it to touch the copper tabs on the front of the solar panels, I folded the conductive ribbon in half the long way, to make kind of an envelope for the solar panels to fit into (see image below). I used an orange satin ribbon to cover the adhesive of the conductive ribbon which would otherwise be exposed through the mesh.
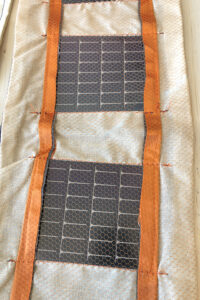


Because the mesh is sewed around the panels on all four sides to keep them in place, and there is no “window” in this method, these solar panels are only removable if you cut through the mesh layer. However, like the method above, there is no rigid or mechanical connection between the copper on the solar panel and the conductive ribbon, they are simply making surface contact.
Surprisingly (to me) this one performed the best in my recent tests. I thought the mesh might be covering part of the usable area and decrease the panels’ performance but it seems ok. Like the method above though, it is possible that the folded ribbon might not always provide a consistent connection. While reliability should be further tested, what I like about this method is that it’s completely soft! There are no hard mechanical parts. It’s also very easy to construct, and doesn’t require the precision of measuring and cutting windows.
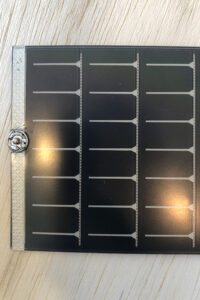
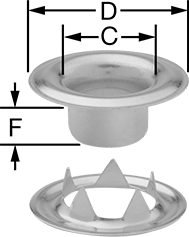
3. Conductive Ring Grommets: Hand Punch
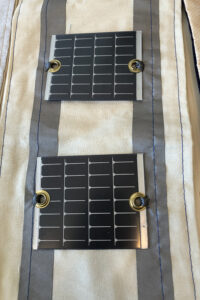
This method does not require soldering. I specifically looked for conductive grommets that I thought would puncture the plastic coating of the solar panels, so I could avoid melting off the plastic coating with a soldering iron. Another benefit of this method is that the ring grommets can serve as a method to both pass power through the panel to the garment and attach the panel to the garment. (No need to stitch around the panels as we did above).
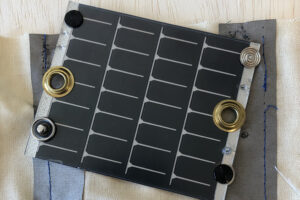
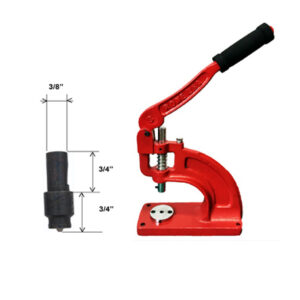
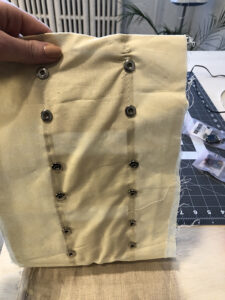
In the below image you can see some of the different grommets we were comparing. (If you are trying not to waste panels, it could be a good idea to test multiple hook-up methods on the same panel). The large gold brass ring grommets were purchased from McMaster Carr and work pretty well. I attached them with a small hand punch, included in the kit. I used the ring grommets with teeth because I thought it might puncture the plastic coating of the solar panel better.
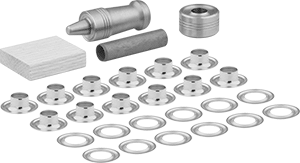
After attaching the brass grommets with the hand punch, I sewed them to the conductive ribbon, using conductive thread. It’s a nice strong mechanical connection and didn’t require any soldering. This is good because working from home in this period (during the pandemic), I didn’t want to fill up my house with the smell of burning plastic.

The hand punch linked above is very affordable. Similar grommet and punch sets can be purchased at craft stores but make sure they are pure brass or silver to ensure they conduct well.
Cons of this method:
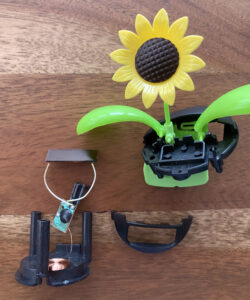
- These ring grommets are large relative to the size of the solar panel and are cutting into the usable area of the panel. The brass grommets may also be a bit less conductive than other materials. This sample is not performing as well as some of the other methods, though the panels still provided enough power for the Solar Rider which is charging my battery (needs >4.5V)
- it is a bit labor intensive to sew the conductive connections by hand, if you are doing many. However, I did not try using the ring grommet to join the fabric to the panel directly, it is just occurring to me that could be a viable option and a labor saver.
- In the samples pictured here, the connections are exposed. For sustained use, you would want to cover the conductive tape with a top fabric to insulate the connections. If it’s only being used in controlled conditions, for example a performance, it is likely ok.
4. Medical Grade Conductive Snaps: Using a Press
We found a local supplier, ROMED that sells medical grade conductive snaps. This was great because we were looking for options for conductive hardware, beyond the sewable conductive snaps we’d been testing from Sparkfun. The ROMED fasteners are best installed with a grommet press, which is a pro for IDM students because you can use the press we have in the Proto Lab, and it makes the snaps very fast to install, no soldering required.
It is a con if you’re trying to do this work elsewhere, because the press is expensive.
Initially I was attracted to the snap system because it could make a good stable connection and the panels would be fully removable. I ultimately ended up just using one side of the snap, because I felt both parts were making my piece bulky, and I wanted to keep it low-profile. As a consequence, the panel is no longer removable but the connection is very secure. However I will show both options below. (Whichever method you choose, set aside one panel and some fabric to test with before you begin).
a. Socket side of snap (attached to Solar Panel in this example, but could also attach to fabric)
Parts required:
– Socket
–Eyelet

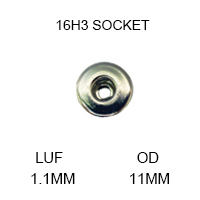
-Socket Die (16H3 used here)
-Eyelet Die (73C used here)
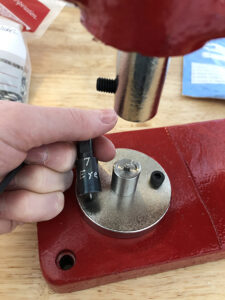
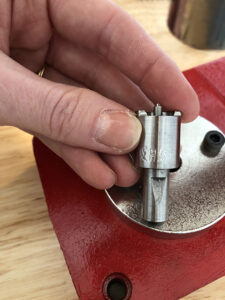
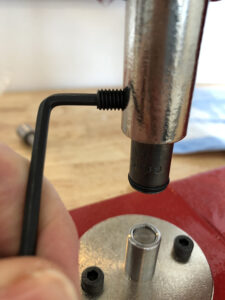
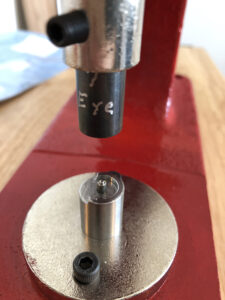
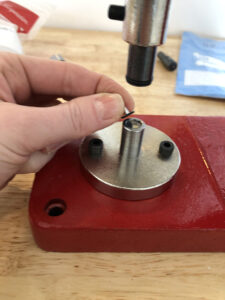
i. Install Dies:
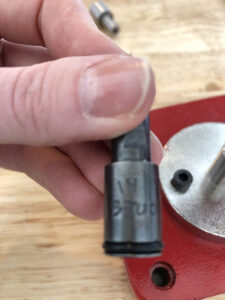
There are threaded screws which need to be loosened in the top piece and base plate in order to remove and install dies. The top die (pictured left) has a more obvious screw which you can loosen with an allen key. The bottom die plate, (pictured right), has a hole on the side. The screw is recessed inside the hole. You can insert your allen key to reach it and loosen/tighten it to install the die.

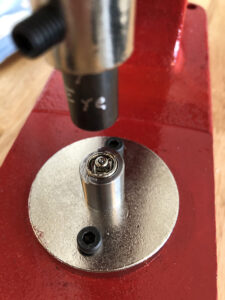
After installing the dies, check to make sure they are aligned. You may need to loosen the screws, make adjustments and retighten. It is very important that the two parts align.
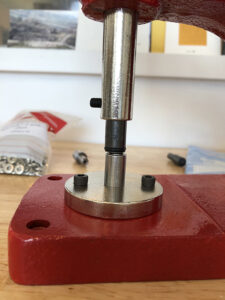
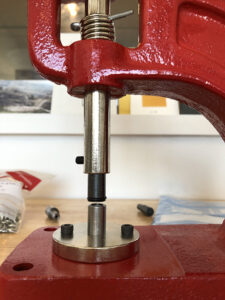
This image above shows the dies for the stud (male) part of the snap system. Note the difference in alignment. In the left image, the top die is too far to the left. By loosening the two screws on the base plate and shifting it over, the alignment is corrected in the image on right.
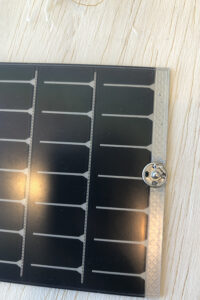
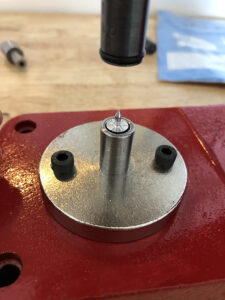
ii. Install Socket to Solar Panel (or fabric)

The 16H3 socket should sit face down in the bottom die. It should feel relatively stable and not move around too much.
- Mark where you want the socket to be inserted on the solar panel.
- Align the solar panel between the top and bottom die.
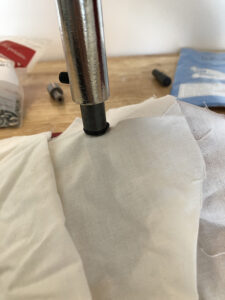
- Press the 73C eyelet into the top die while using your other hand to operate the press (see video)
Video showing installation on a solar panel:
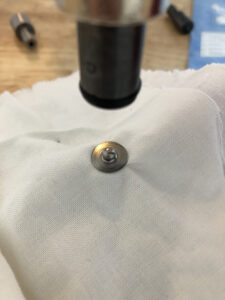
If installing the socket directly to the solar panel as shown in the video above, your next step will be to install the stud, or “snap” part to fabric to make a connection (step 2). The socket should have punctured the waterproof coating on the solar panel, allowing it to make a good electrical connection.
Alternatively, you could attach the panel directly to the fabric in step 1 instead. To do this, you would press the socket through both the fabric and the solar panel at the same time. (Images below).
b. Snap side (stud) attached to conductive ribbon on fabric
Parts required:
14 Stud
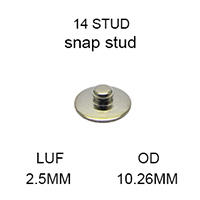
1699 tack

14 Stud Die (top of machine)
1699 die (bottom of machine)

i. Install Dies:
Follow same steps as above to use allen key to swap out the dies and adjust alignment
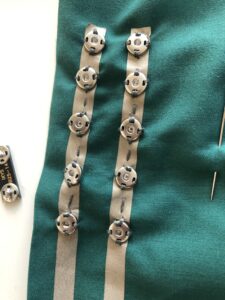
ii. Install Stud (snap part) to fabric
Place the aluminum tack with pointed side up, in the bottom die.
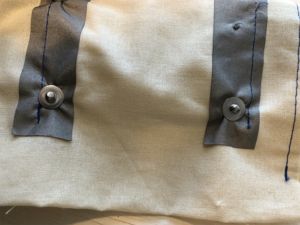
Mark where you want the snap to be inserted on fabric. Align fabric over the pointed tack. Press the 14 Stud (snap), with snap side up into the top die. Use one hand to keep it in place and your other hand to close the press.


Press the snap that is attached to the fabric into the socket of the solar panel and you will have a removable, conductive connection.
Note that in the image above, the snap is being attached to fabric, but there are no traces to carry the power. This is a practice snap. I highly recommend you practice! It can take a few tries to get the hang of it. If the snap is not well applied, it may be distorted and hard to close. Once you’re ready, you would likely want to put down conductive fabric traces before installing the snap, for example in the image below:
Summary
The examples above show many options for connecting a flexible solar panel to a circuit (soldering to wire, pressing to conductive tape, attaching to conductive fabric tape with grommets) as well as options for securing the panel to fabric.
If you have other ideas or suggestions, feel free to share by emailing kmm464 AT nyu DOT edu