In this tutorial, we will make a headband that tells you maybe it’s time to consider putting on some shades or sunscreen. The headband has a vibration motor right behind your ear that will turn on if the solar panels get enough sunlight (~1.5V) and increase vibration intensity as the voltage goes up with exposure to stronger rays. Stronger vibrations might mean your chances of being exposed to UV rays may be higher. We should always be mindful of ultraviolet rays outdoors by putting on our shades and applying sunscreen even on cloudy days. Ultraviolet rays can reflect off of snow, water, and even the beach and go straight into our eyes, which over time causes many eye problems. Applying sunscreen, as we all know, will also help prevent premature skin aging and damage.
In tandem with our series of solar tutorials, this is our latest addition to a more manageable, and less time-consuming project. If you checked out our solar necklace tutorial, you could reuse almost the same materials and techniques to make this solar headband. Our goal here is to connect eTextiles or soft robotics and circuit interfaces with sustainable power sources. Having solar panels accessible in scale and size that allows us to integrate them into flexible forms such as wearables opens a new door in the DIY technology trend.
This tutorial will cover:
Step 1: Soldering the nickel strips to the solar panels
Step 2: Laser cutting instructions
Step 3: Laying out the wiring for the solar panel circuit
Step 4: Sewing the panels in place
Step 5: Sewing in the button
Step 6: Connecting to the vibration motor
Step 7: Connecting the diode
Step 8: Sewing in the elastic band
Step 9: Finishing touches
Construction time: 1 hour 30 minutes
List of materials you will need:
- 4 Mini Solar Panels
- 7”x 20” piece of Neoprene fabric
- Black elastic band
- Nickel Battery Tabs
- Conductive Nylon Tape
- Lighter/see-through fabric (we used linen here)
- Conductive Thread (30 Ω/m)
- 3V Coin Vibration motor
- Self-Lock Push Button Switch
- 1N4007 Rectifier Diode
- Crystal clear tape
Equipment needed: Laser cutter or possibly a Cricut, (we haven’t tested this as an alternative, but neoprene is listed on the Cricut website), or another programmable cutting machine.
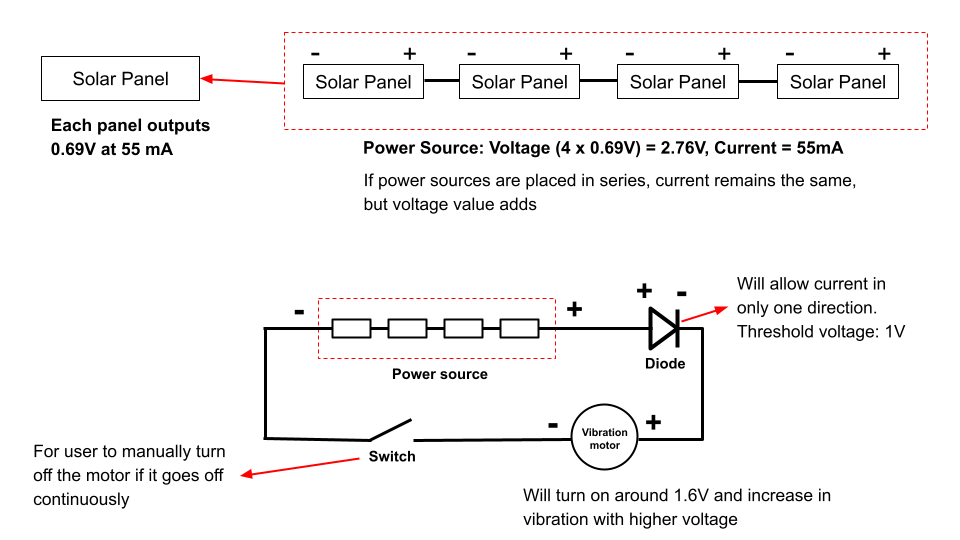
Design of the headband and the circuit arrangement:
This design uses solar panels to turn ON a vibration motor when the panels get exposed to strong sunlight. The vibration signals the wearer that at this level of exposure to the sun they should put on their sunglass or wear sunscreen. The vibration can be turned off with a switch on the other side of the headband.

Link to the laser cut file for the headband:
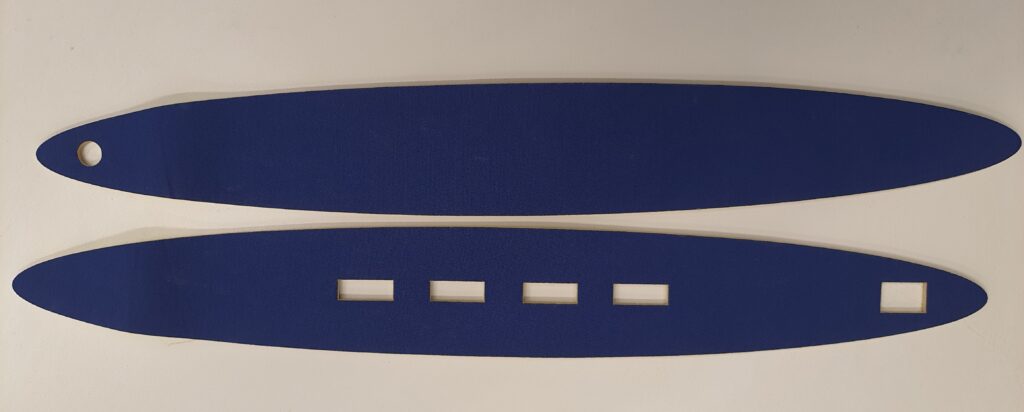
The top and bottom parts of the headband
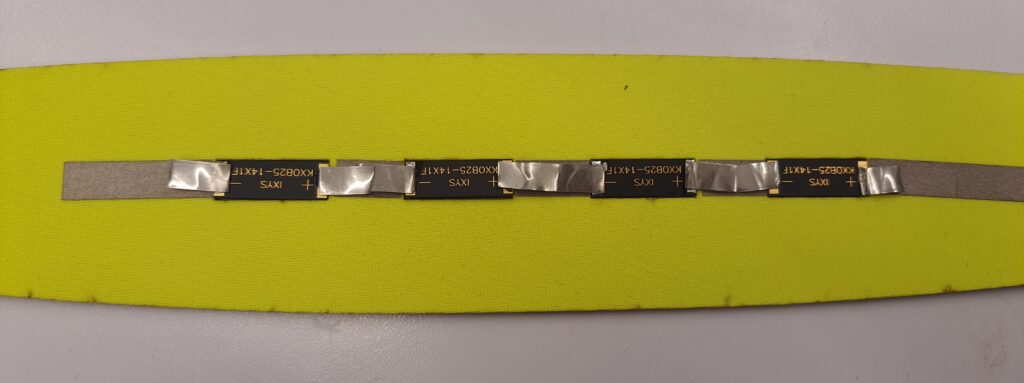
Step 1: Soldering the nickel strips to the solar panels
We used the same soldering technique that we used to construct the solar necklace tutorial.
Step 2: Laser cutting instructions
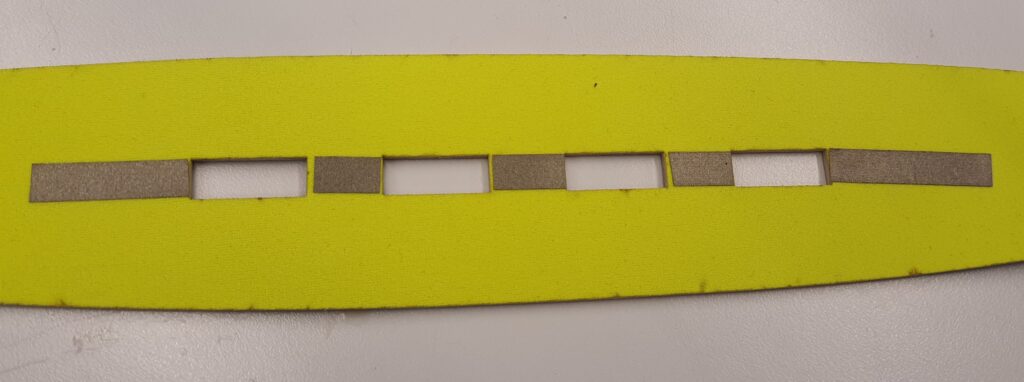
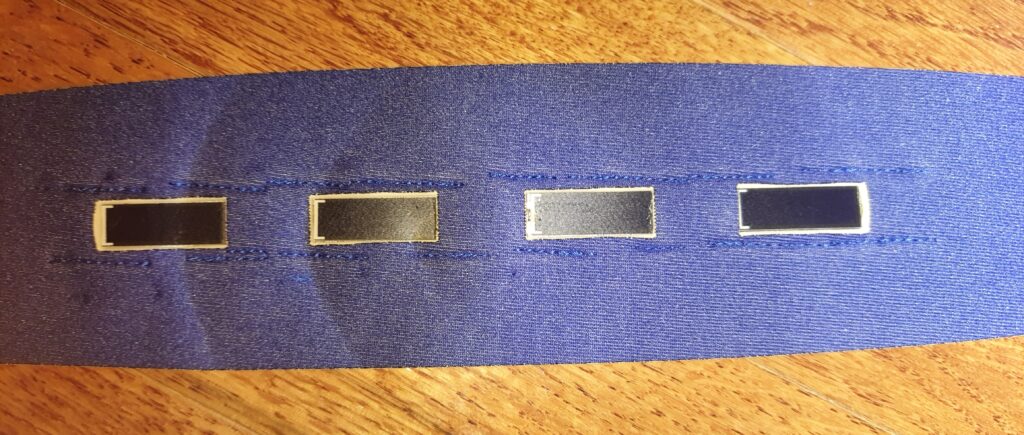
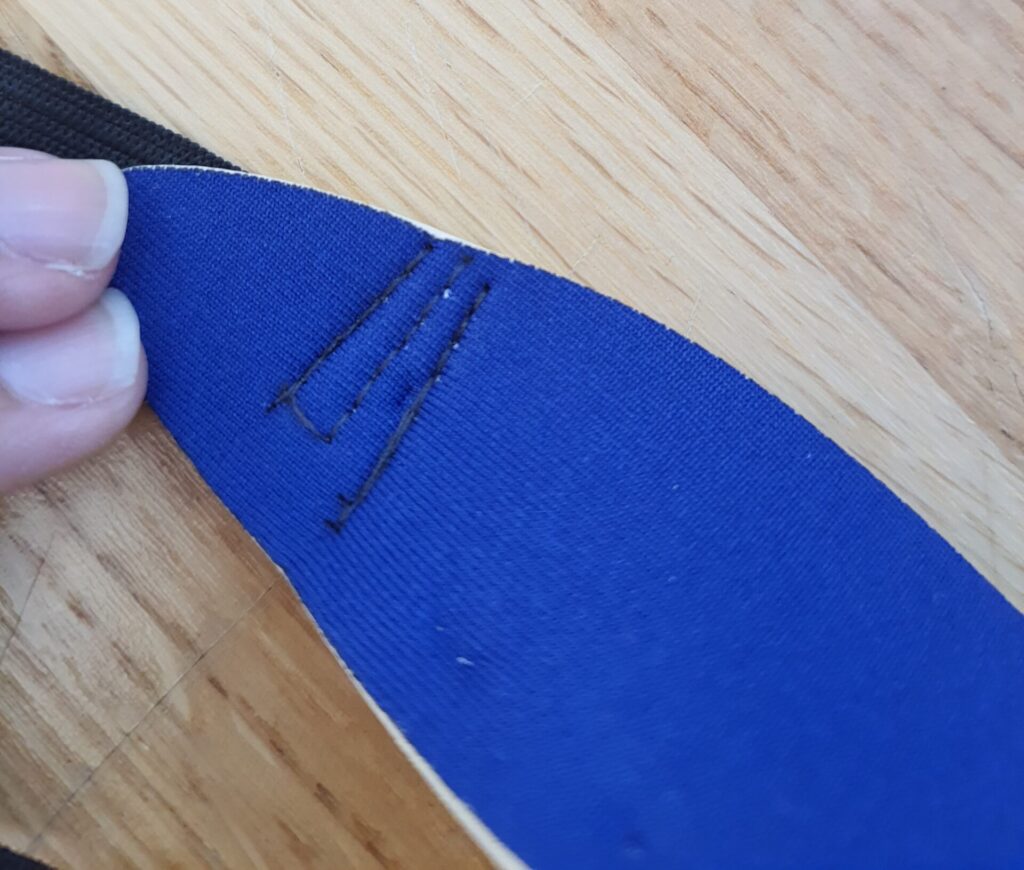
For the headband material, we chose neoprene because it does not fray, and the thickness of the material created a window that is the perfect size for the solar panels. Keep note that the neoprene fabric has a different color on both sides and here we used blue at the front with a yellow piece behind it.
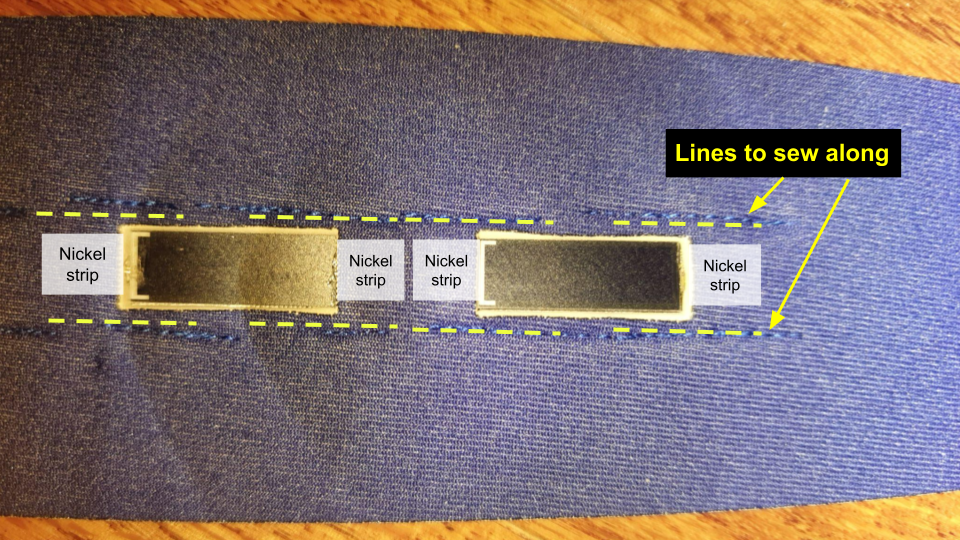
Step 3: Laying out the wiring for the solar panel circuit
Step 4: Sewing the panels in place
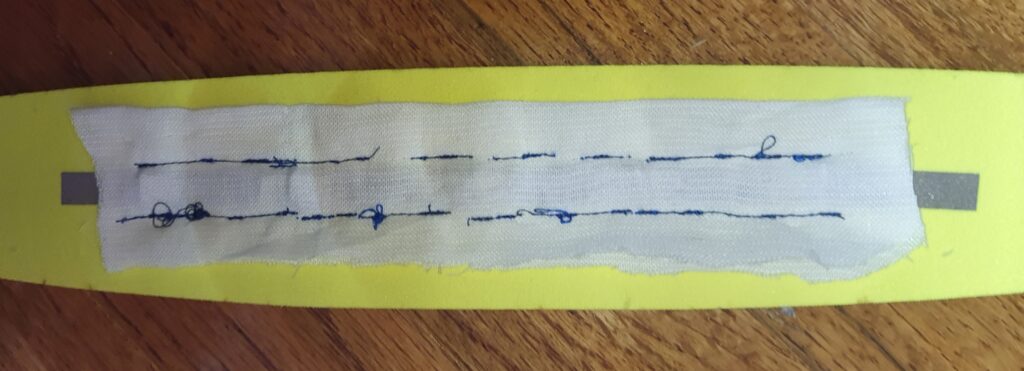
We recommend referring to the sewing video we used for the solar necklace tutorial. It follows the same process we applied here, by placing a linen cloth over the circuit arrangement, pinning it in place, and sewing the panels in place.
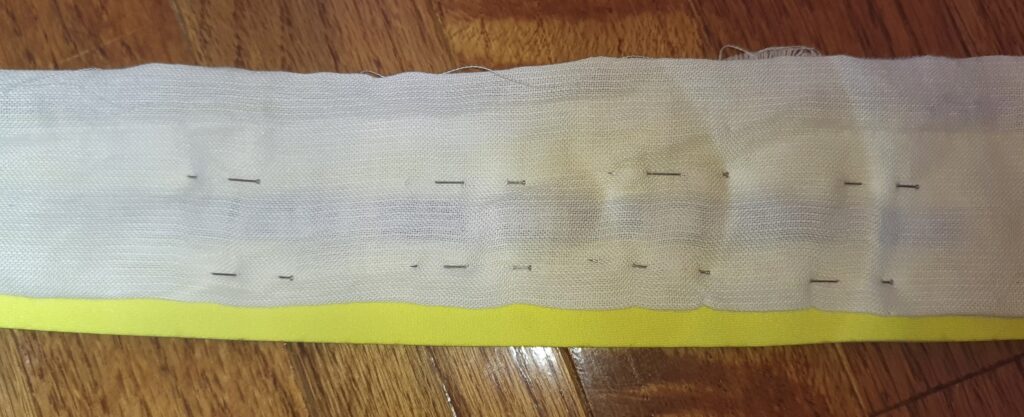
This arrangement of sewing locks the panels in place, while also allowing for the headband to bend and be flexible around the panels.
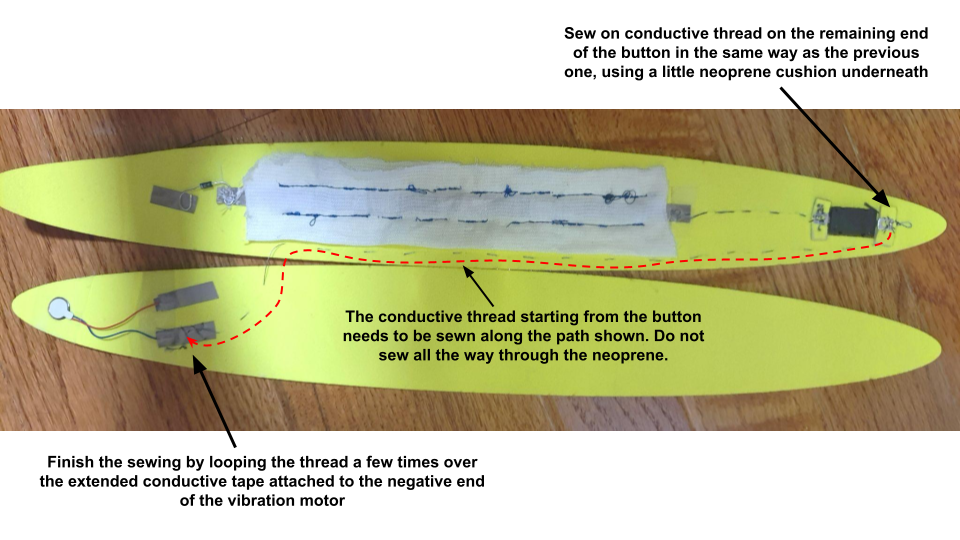
Step 5: Sewing in the button
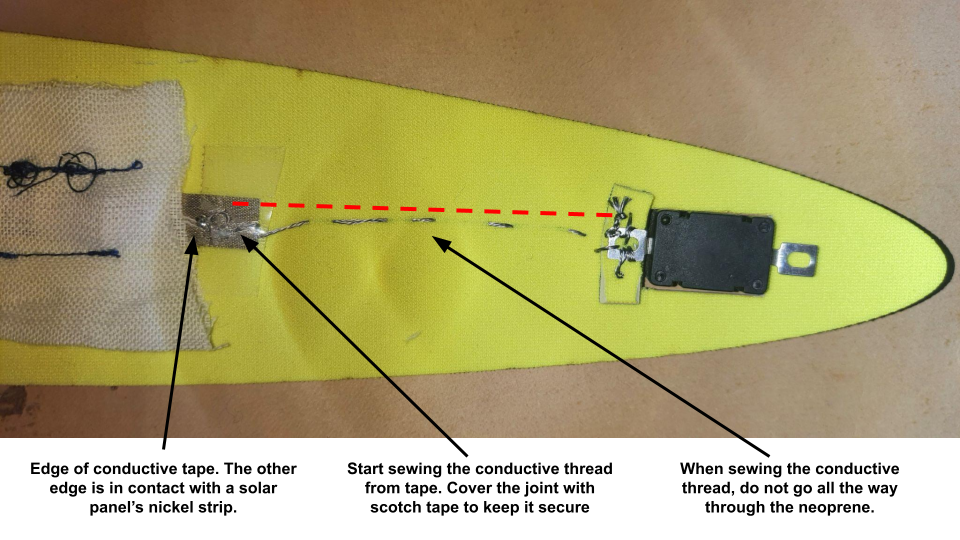
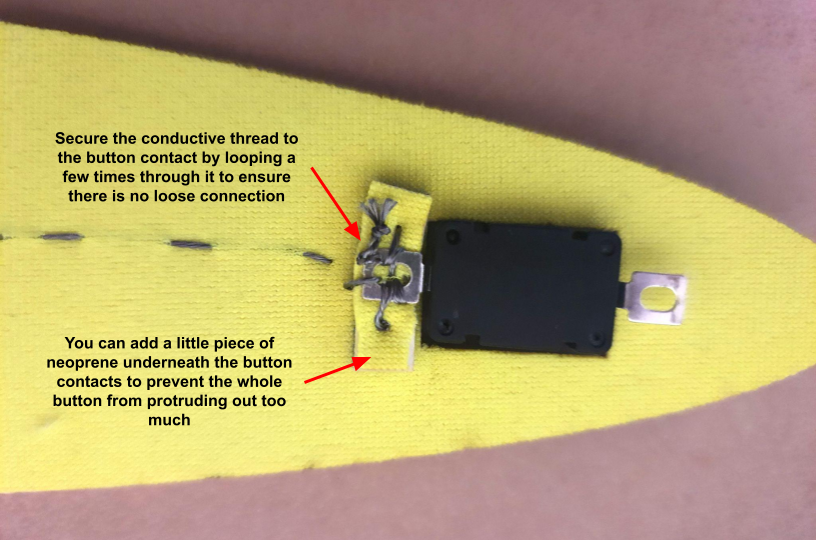

Step 6: Connecting to the vibration motor
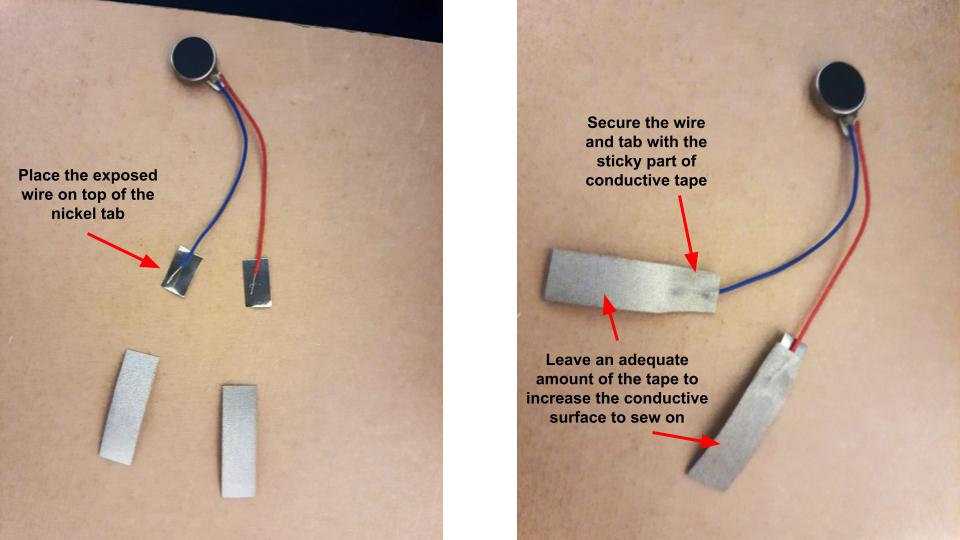
If there is not enough exposed wire, use a wire stripper to strip off the other plastic and expose the inner wire to around 0.75cm.


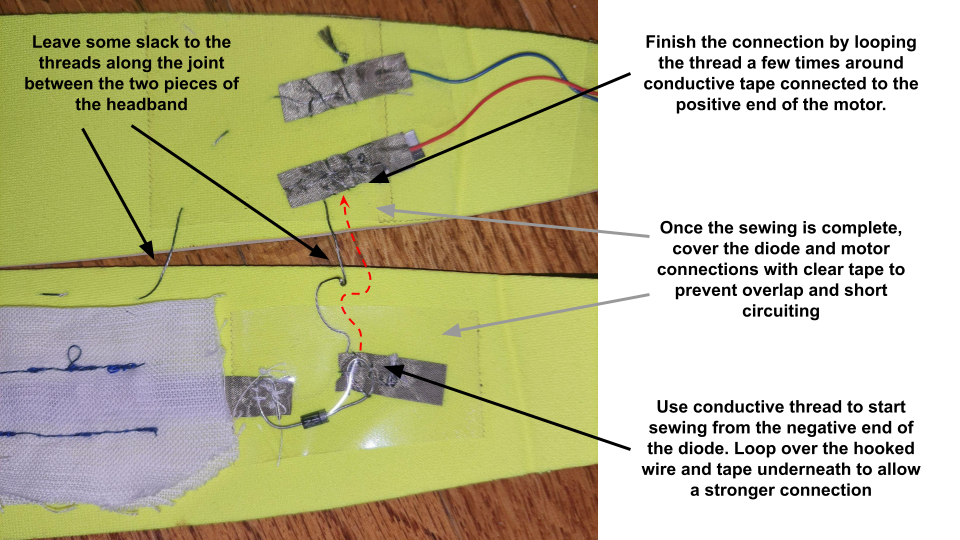
Step 7: Connecting the diode
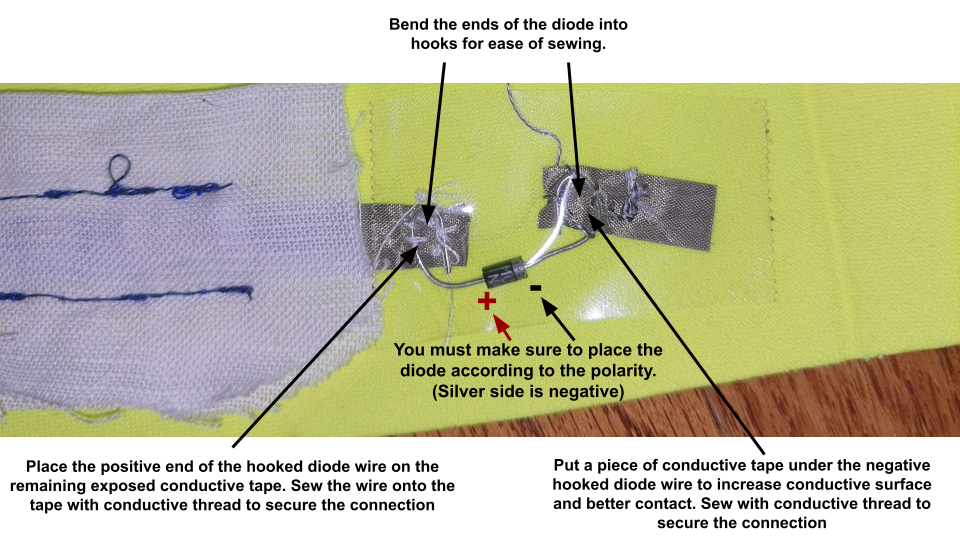
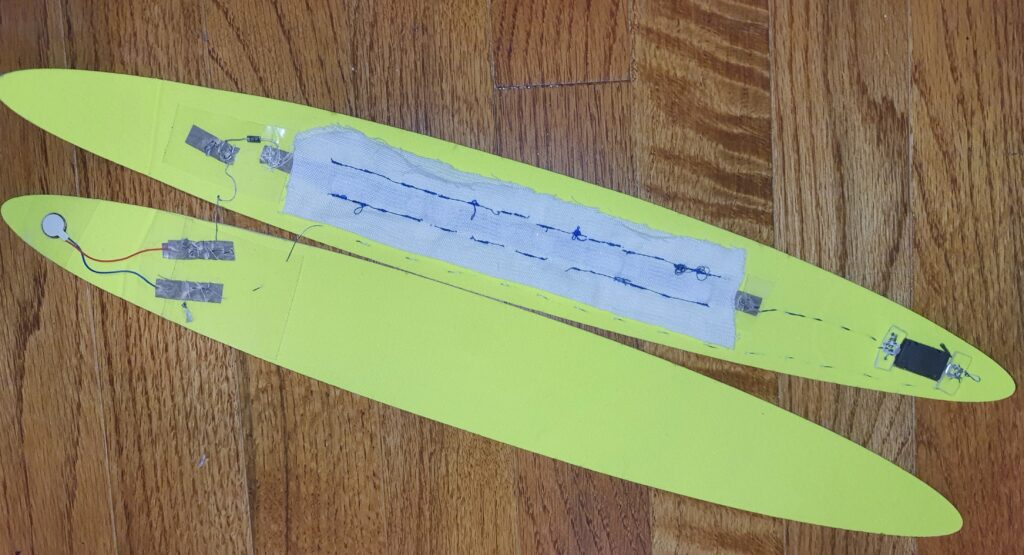
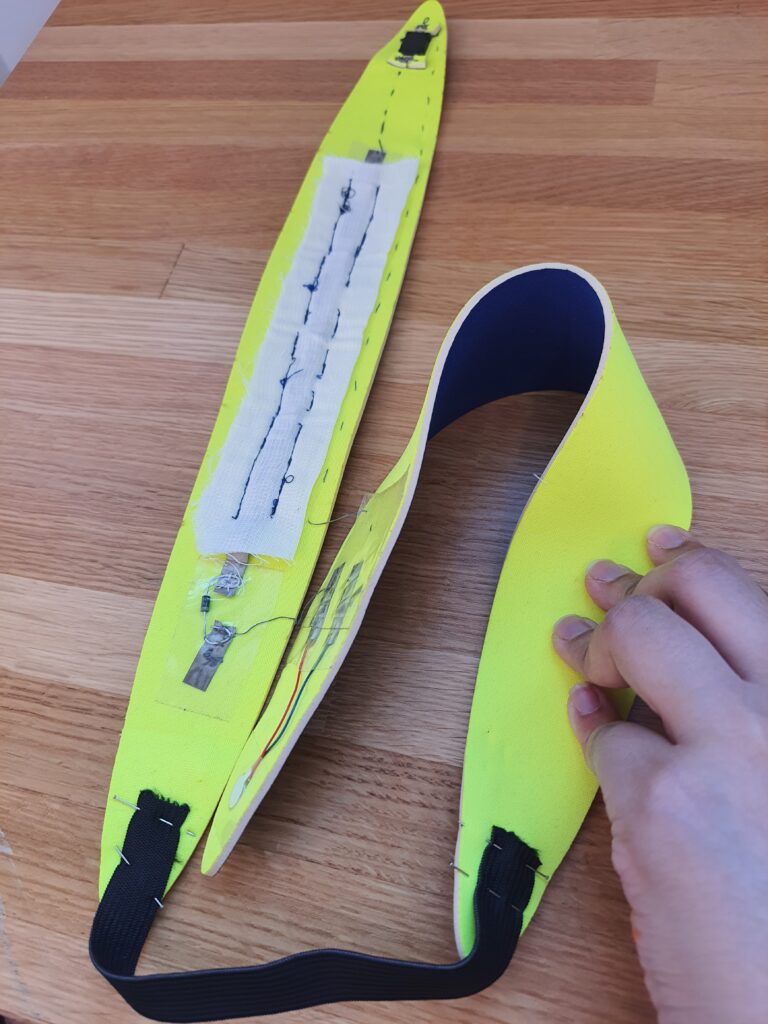
Now we will proceed with completing the entire circuit on the headband. Lay both the pieces of the headband according to the orientation shown below. We will first connect the remaining end of the button switch to the negative end of the vibration motor. After this connection is secured, the two headband pieces will no longer be separate. To finish off the connection, the negative end of the diode will be connected to the positive end of the vibration motor.
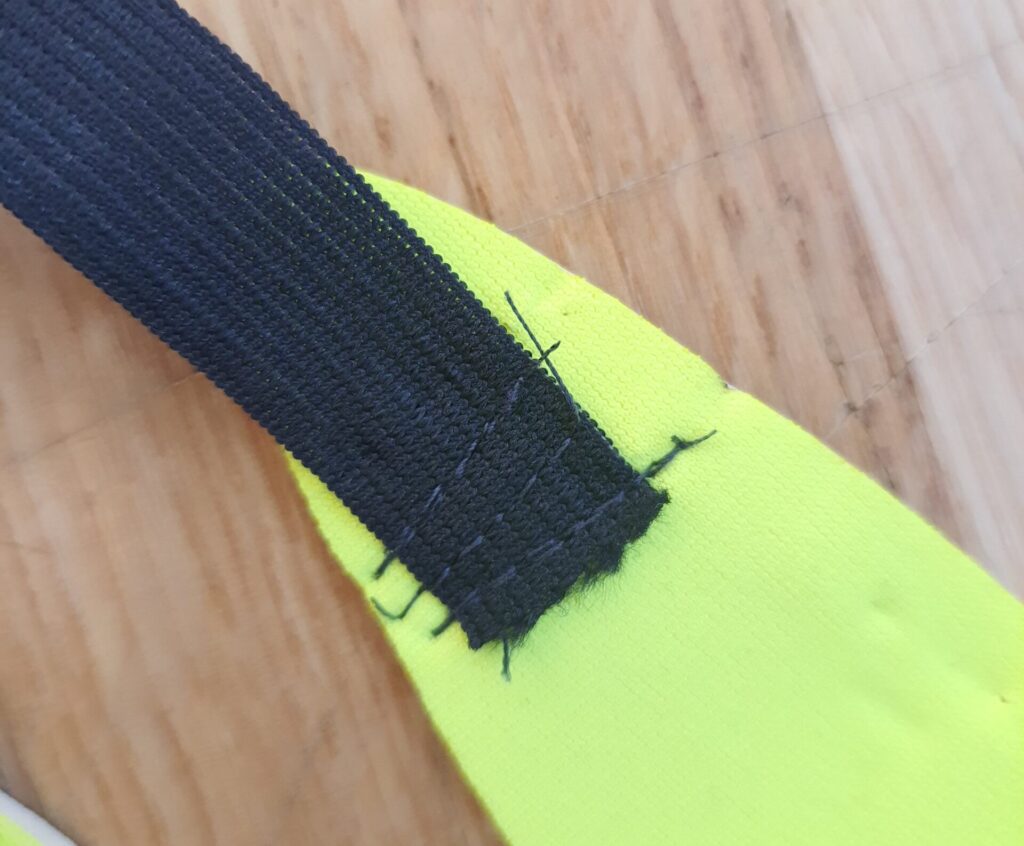
Step 8: Sewing in the elastic band
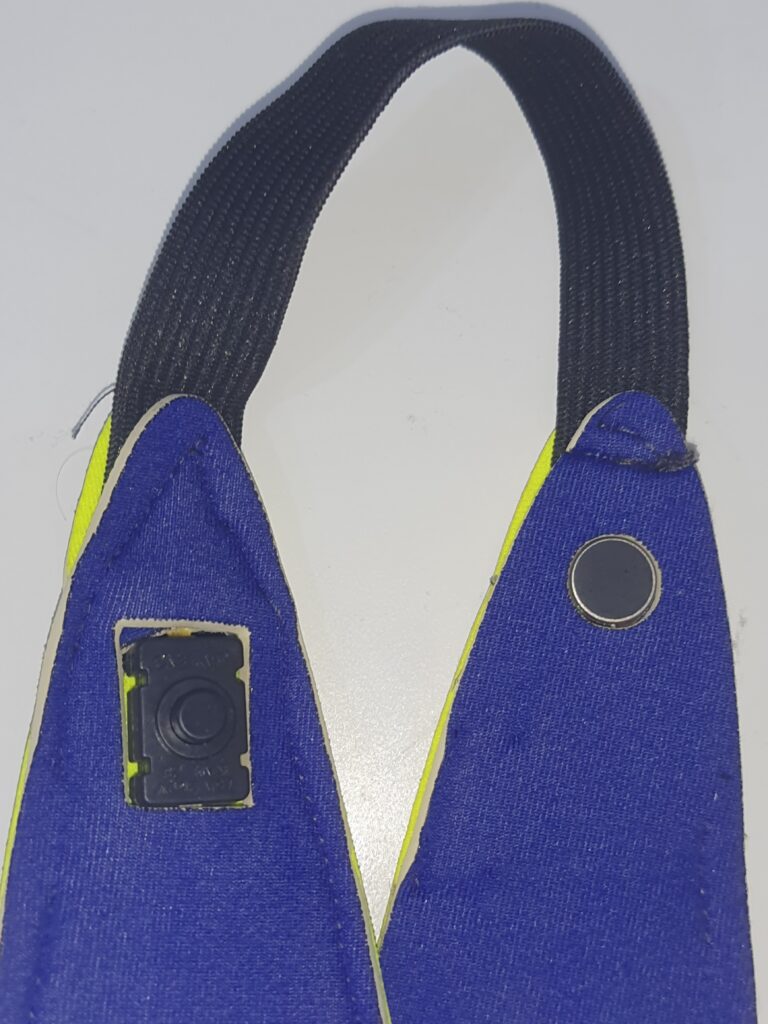
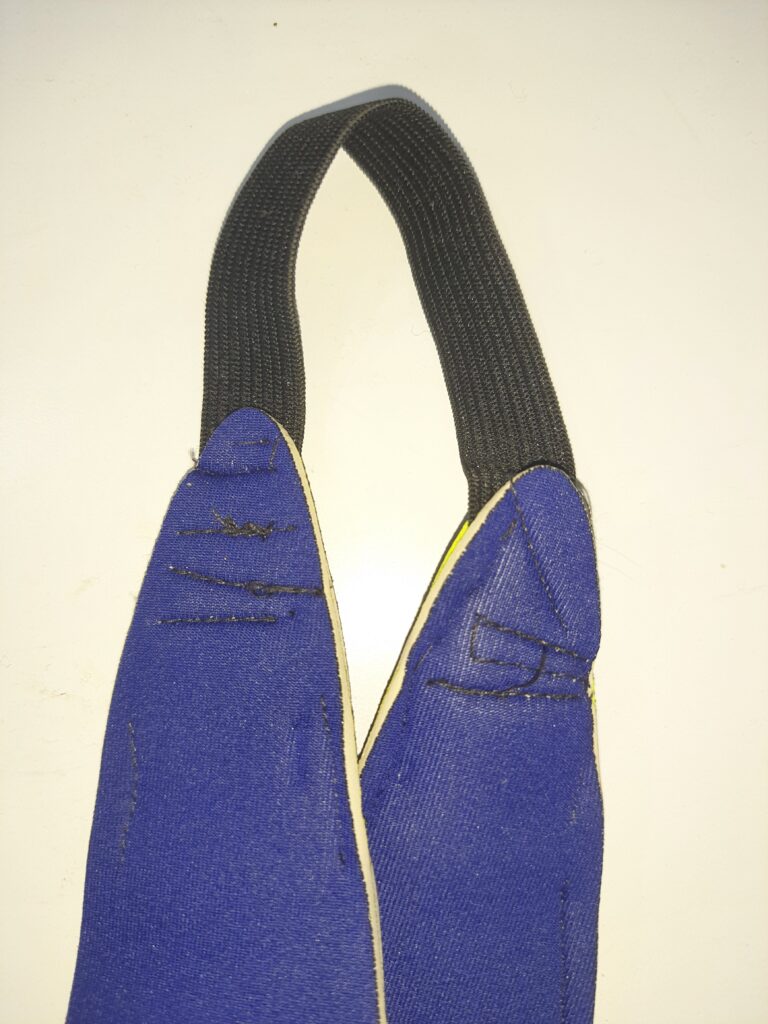
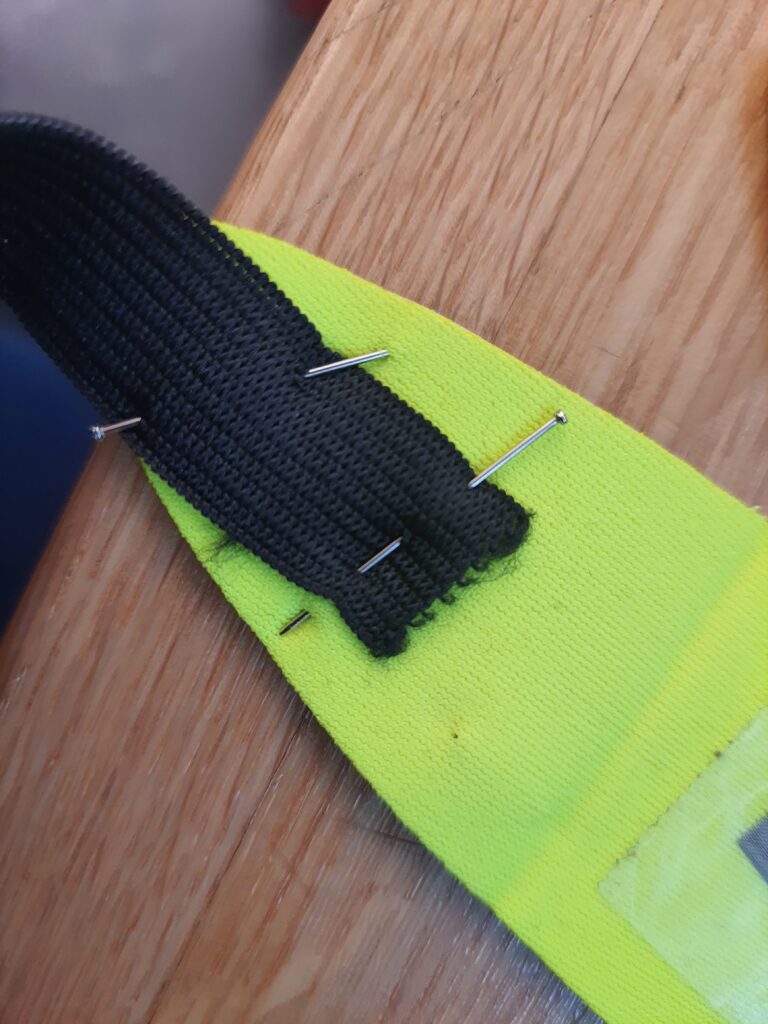
To start off, we need a strip of black elastic band with a length of around 7 inches.
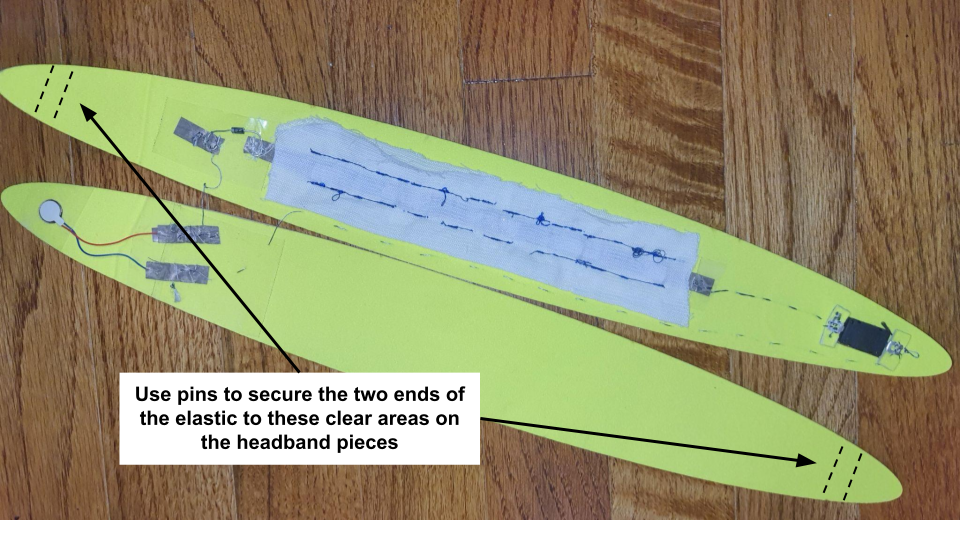
The following two images show how the headband will look after securing the elastic with pins.
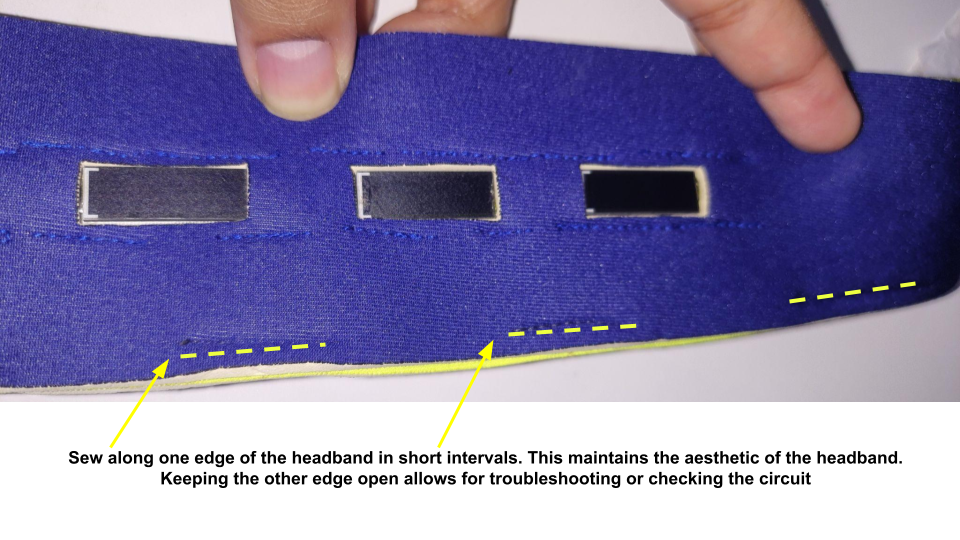
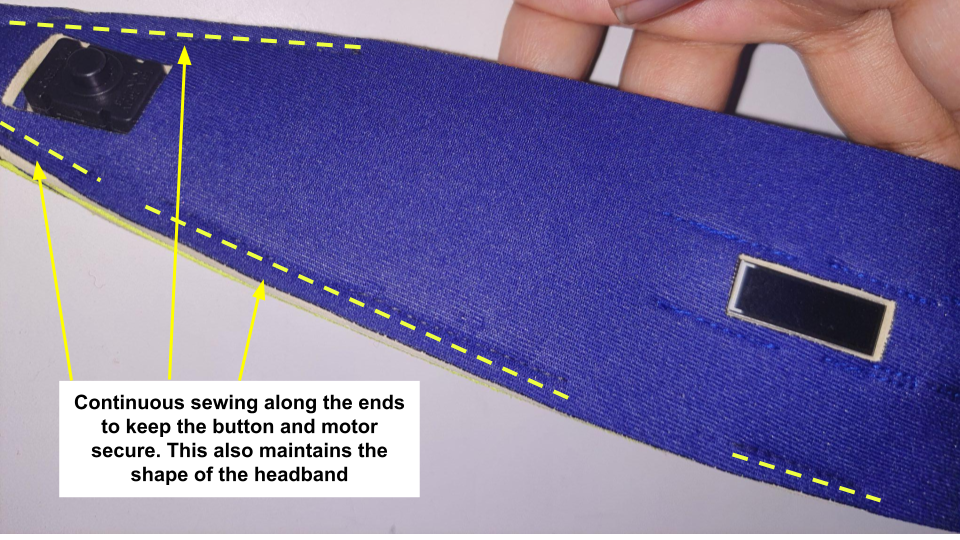
Step 9: Finishing touches
This part is all about sewing the two parts of the headband and making it ready for wearing.